In this post, we will be looking at getting an ESP32 working with NuttX and WIFI networking enabled, using a Mac as the development platform. The ESP hardware is a LOLIN32, but any dev-kit C ESP32 hardware will work fine.
The inspiration for this post is based on Sara Monteiro's nuttx+esp32 getting started article article, but adapted for MacOS and extended to support WIFI networking configuration.
Environment Setup
For the sake of simplicity, I will be using a environment variable to point of the folder used for this project. I am also using fish as the default shell.
export NUTTX_SPACE=(realpath ~/projects/iot/nuttxspace/)
Download NuttX
First step is to checkout the source NuttX code:
cd $NUTTX_SPACE
git clone https://bitbucket.org/nuttx/tools.git
git clone https://github.com/apache/incubator-nuttx.git nuttx
git clone https://github.com/apache/incubator-nuttx-apps.git apps
Build kconfig configuration tool.
cd $NUTTX_SPACE/tools/kconfig-frontends
./configure --enable-mconf
make
make install
Bootloader
mkdir {$NUTTX_SPACE}/esp-bins
curl -L "https://github.com/espressif/esp-nuttx-bootloader/releases/download/latest/bootloader-esp32.bin" -o $NUTTX_SPACE/esp-bins/bootloader-esp32.bin
curl -L "https://github.com/espressif/esp-nuttx-bootloader/releases/download/latest/partition-table-esp32.bin" -o $NUTTX_SPACE/esp-bins/partition-table-esp32.bin
Alternatively, building your own version of the boot-loader can be done quite easily, provided you have docker installed.
git clone https://github.com/espressif/esp-nuttx-bootloader.git {$NUTTX_SPACE}/esp-bootloader
docker run --rm -v {$NUTTX_SPACE}/esp-bootloader:/work -w /work espressif/idf:release-v4.3 ./build.sh
If all works fine, you should be able to see the built files in the out_ folder:
ls -la {$NUTTX_SPACE}/out/
drwxr-xr-x   8 ron  staff    256 28 Feb 10:19 ./
drwxr-xr-x  14 ron  staff    448 28 Feb 10:18 ../
-rw-r--r--   1 ron  staff  23824 28 Feb 10:17 bootloader-esp32.bin
-rw-r--r--   1 ron  staff  18528 28 Feb 10:19 bootloader-esp32c3.bin
-rw-r--r--   1 ron  staff   3072 28 Feb 10:17 partition-table-esp32.bin
-rw-r--r--   1 ron  staff   3072 28 Feb 10:19 partition-table-esp32c3.bin
-rw-r--r--   1 ron  staff  36748 28 Feb 10:17 sdkconfig-esp32
-rw-r--r--   1 ron  staff  33935 28 Feb 10:19 sdkconfig-esp32c3
ESP-IDF
Assuming that you have already installed the ESP-IDF, you should be able to
export IDF_PATH=(realpath ~/projects/iot/esp-idf/)
. $IDF_PATH/export.fish
Building the app
App Configuration
Generate the kernel/app configuration for the ESP32 platform.
cd {$NUTTX_SPACE}/nuttx
./tools/configure.sh esp32-devkitc:nsh
This will create the file .config which contains all the necessary flags for ESP32. For example, this is the generated config for the devkit-C:
CONFIG_ARCH_XTENSA=y
CONFIG_ARCH="xtensa"
CONFIG_ARCH_CHIP="esp32"
CONFIG_ARCH_BOARD="esp32-devkitc"
CONFIG_ARCH_CHIP_ESP32=y
CONFIG_ARCH_FAMILY_LX6=y
CONFIG_XTENSA_CP_INITSET=0x0001
CONFIG_XTENSA_DUMPBT_ON_ASSERT=y
CONFIG_XTENSA_BTDEPTH=50

#
# ESP32 Configuration Options
#
CONFIG_ARCH_CHIP_ESP32WROVER=y
CONFIG_ESP32_DUAL_CPU=y
CONFIG_ESP32_FLASH_4M=y
CONFIG_ESP32_PSRAM_8M=y
CONFIG_ESP32_ESP32DXWDXX=y
CONFIG_ESP32_DEFAULT_CPU_FREQ_240=y
CONFIG_ESP32_DEFAULT_CPU_FREQ_MHZ=240
Build
make
If all goes fine, you should be able to see this at the end of the compilation
AR (create): libboard.a   esp32_boot.o esp32_bringup.o esp32_appinit.o
LD: nuttx
CP: nuttx.hex
CP: nuttx.bin
MKIMAGE: ESP32 binary
esptool.py --chip esp32 elf2image --flash_mode dio --flash_size "4MB" -o nuttx.bin nuttx
esptool.py v3.1-dev
Generated: nuttx.bin (ESP32 compatible)
Flash
I am using a Wemos LOLIN32 1.0
make download ESPTOOL_PORT=/dev/cu.SLAB_USBtoUART ESPTOOL_BAUD=115200 ESPTOOL_BINDIR={$NUTTX_SPACE}/esp-bins
Connecting........_
Chip is ESP32-D0WDQ6 (revision 1)
Features: WiFi, BT, Dual Core, 240MHz, VRef calibration in efuse, Coding Scheme None
Crystal is 40MHz
MAC: b4:e6:2d:95:b1:05
Uploading stub...
Running stub...
Stub running...
Configuring flash size...
Compressed 23824 bytes to 14851...
Wrote 23824 bytes (14851 compressed) at 0x00001000 in 1.6 seconds (effective 118.2 kbit/s)...
Hash of data verified.
Compressed 3072 bytes to 69...
Wrote 3072 bytes (69 compressed) at 0x00008000 in 0.1 seconds (effective 454.4 kbit/s)...
Hash of data verified.
Compressed 124896 bytes to 52034...
Wrote 124896 bytes (52034 compressed) at 0x00010000 in 4.8 seconds (effective 207.1 kbit/s)...
Hash of data verified.

Leaving...
Hard resetting via RTS pin...
Connecting to NuttX shell
screen /dev/cu.SLAB_USBtoUART 115200
Just write help and you'll should see this:
help usage:  help [-v] [<cmd>]

  .         cd        echo      hexdump   mh        rm        time      xd
  [         cp        exec      kill      mount     rmdir     true
  ?         cmp       exit      ls        mv        set       uname
  basename  dirname   false     mb        mw        sleep     umount
  break     dd        free      mkdir     ps        source    unset
  cat       df        help      mkrd      pwd       test      usleep

Builtin Apps:
  nsh  sh
nsh>
Voila, that's it for the basic config. Next step is to enable the WIFI connectivity.
Enabling WIFI Networking
NuttX uses the uIP networking stack, unlike ESP-IDF which uses LWiP.
Basic Network config
Enabling WIFI can be done by configuring the nuttx app:
make -C {$NUTTX_SPACE}/nuttx distclean
{$NUTTX_SPACE}/nuttx/tools/configure.sh esp32-devkitc:nsh
make -C {$NUTTX_SPACE}/nuttx menuconfig
Go to Networking Support and enable it, as well as
    * Networking Support: yes
        * Link layer support
            * Late driver initialization: yes
    * System Type
        * ESP32 Peripheral Selection
            * Wireless: yes
    * RTOS Features
        * Work queue support
            * Generic work notifier
            * High priority (kernel) worker thread
        * Pthread Options
            *  Enable mutex types
    * Device Drivers
        * Wireless Device Support
            * IEEE 802.11 Device Support
To make it easier to debug, I also enabled the traces from:
    * Build Setup
        * Debug Options
            * Enable Error Output
            * Enable Debug Features
            * Network Debug Features
            * Wireless Debug Features
After flashing the, the following logs can be seen:
I (266) boot: Disabling RNG early entropy source...
esp32_rng_initialize: Initializing RNG
esp32_net_initialize: B4:E6:2D:95:B1:05
netdev_register: Registered MAC: b4:e6:2d:95:b1:05 as dev: wlan0
I (16) wifi:wifi driver task: 5, prio:253, stack:3584, core=0
I (18) wifi:wifi firmware version: 3cc2254
I (18) wifi:wifi certification version: v7.0
I (18) wifi:config NVS flash: disabled
I (22) wifi:config nano formating: disabled
I (26) wifi:Init data frame dynamic rx buffer num: 32
I (31) wifi:Init management frame dynamic rx buffer num: 32
I (36) wifi:Init management short buffer num: 32
I (40) wifi:Init dynamic tx buffer num: 32
I (44) wifi:Init static rx buffer size: 1600
I (48) wifi:Init static rx buffer num: 10
I (52) wifi:Init dynamic rx buffer num: 32
netdev_ifr_ioctl: cmd: 1794
tcp_callback: flags: 0040
netdev_ifr_ioctl: cmd: 1796
tcp_callback: flags: 0040
netdev_ifr_ioctl: cmd: 1800
tcp_callback: flags: 0040
netdev_ifr_ioctl: cmd: 1818
wlan_ifup: Bringing up: 10.0.0.2
tcp_callback: flags: 0040

NuttShell (NSH) NuttX-10.0.1
nsh> ifconfig
wlan0   Link encap:Ethernet HWaddr b4:e6:2d:95:b1:05 at UP
        inet addr:10.0.0.2 DRaddr:10.0.0.1 Mask:255.255.255.0
Accessing WAPI
WAPI is a lightweight wrapper for iwconfig, wlanconfig, ifconfig, and route commands, and that's the command we need to use to scan the av available access points.
The first attempt resulted in a failure due to the missing ioctl support.
nsh> wapi scan wlan0
netdev_ifr_ioctl: cmd: 35608
ioctl(SIOCSIWSCAN): 25
ERROR: Process command (scan) failed.
After enabling the Wireless IOCTL
    * Networking support
        * Network Device Operations
            * Enable Wireless ioctl()
Unfortunately, at the time of writing (Feb. 2021), one can notice that from the esp32_wlan.c, the scan is not currently supported. So, the only possiblity is to connect manually:
wapi psk wlan0 access_point_password 0
wapi essid wlan0 access_point_ssid 0
From my access point running OpenWRT, I could notice that the ESP32 was connected, and was allocated an IP address. However, from the NSH CLI, the IP address remmained unchanged:
nsh> ifconfig
wlan0   Link encap:Ethernet HWaddr b4:e6:2d:95:b1:05 at UP
        inet addr:10.0.0.2 DRaddr:10.0.0.1 Mask:255.255.255.0
Also, pinging the device from my Mac laptop to the IP address mentionned on the OpenWRT router, would result in frames beeing dropped (or unanswered) since uIP did not get the correct IP config.
nsh> wlan_rxpoll: ARP frame
arp_arpin: ARP request for IP da01a8c0
Enabling DHCP support
To enable the DHCP client:
    * Networking Support
        * UDP Networking
            * UDP Networking
            * UDP broadcast Rx support
        * Socket Support
            * Socket options
    * Library Routines
        * NETDB Support
            * DNS Name resolution
    * Application
        * System Libraries and NSH Add-Ons
            * DHCP Address Renewal (NEW)
        * Wireless Libraries and NSH Add-Ons
            * IEEE 802.11 Configuration Library
                * IEEE 802.11 Command Line Tool
After that, and refering to this post on esp32.com, it is possible to enable the DHCP for the network initlization using:
    * Application
        * Network Utilities
            * DHCP client
            * Network initialization
                * IP Address Configuration
                    * Use DHCP to get IP address
                    * Router IPv4 address: 0xc0a80101
It is quite weird to have to configure the Router IPv4 address, and further more having to do it using hexadecimal (0xc0a80101 in my case), but well, that's the only way to get things working.
Unfortunately, that was not enough. After trying to setup the SSID and passkey from WAPI, it always ended-up with errors:
NuttShell (NSH) NuttX-10.0.1
nsh> wapi psk wlan0 my-ap-password 1
netdev_ifr_ioctl: cmd: 35636
nsh> wapi essid wlan0 my-ap-ssid 1
netdev_ifr_ioctl: cmd: 35610
phy_version: 4500, 0cd6843, Sep 17 2020, 15:37:07, 0, 2
wifi_set_intr: cpu_no=0, intr_source=0, intr_num=0, intr_prio=1I (6220) wifi:mode : sta (b4:e6:2d:95:b1:05)
I (6221) wifi:enable tsf
esp_event_post: Event: base=WIFI_EVENT id=2 data=0 data_size=0 ticks=4294967295
I (6231) wifi:Set ps type: 0

I (6597) wifi:new:<3,0>, old:<1,0>, ap:<255,255>, sta:<3,0>, prof:1
I (7249) wifi:state: init -> auth (b0)
I (7256) wifi:state: auth -> assoc (0)
I (7262) wifi:state: assoc -> run (10)
I (7276) wifi:connected with my-ap-ssid, aid = 2, channel 3, BW20, bssid = ee:41:18:0c:53:dd
I (7277) wifi:security: WPA2-PSK, phy: bgn, rssi: -29
I (7278) wifi:pm start, type: 0

esp_event_post: Event: base=WIFI_EVENT id=4 data=0x3ffe5bb0 data_size=44 ticks=4294967295
nsh> I (7301) wifi:AP's beacon interval = 102400 us, DTIM period = 2
The only way to overcome this issue was to set the SSID and passkey directly in the menu config, under Application -> Network Utilities -> Network initialization -> WAPI Configuration (SSID / Passprhase). And fortunately, after that, it was possible to the the correct IP address:
nsh> ifconfig
wlan0   Link encap:Ethernet HWaddr b4:e6:2d:95:b1:05 at UP
        inet addr:192.168.1.218 DRaddr:192.168.1.1 Mask:255.255.255.0
Pinging the Internet
Unfortunately, even after having the correct IP condiguration, PING would still not work, failing with socket address family unsupported.
nsh> ping baidu.com
dns_recv_response: ID 36690
dns_recv_response: Query 128
dns_recv_response: Error 0
dns_recv_response: Num questions 1, answers 2, authrr 0, extrarr 0
dns_recv_response: Question: type=0001, class=0001
dns_parse_name: Compressed answer
dns_recv_response: Answer: type=0001, class=0001, ttl=0000bf, length=0004
dns_recv_response: IPv4 address: 220.181.38.148
dns_parse_name: Compressed answer
dns_recv_response: Answer: type=0001, class=0001, ttl=0000bf, length=0004
dns_recv_response: IPv4 address: 39.156.69.79
psock_socket: ERROR: socket address family unsupported: 2
socket: ERROR: psock_socket() failed: -106
The missing link was to enable IPPROTO_ICMP socket support under Networking Support -> ICMP Networking Support
NuttShell (NSH) NuttX-10.0.1
nsh>
nsh> ping baidu.com
sendto_eventhandler: Send ICMP request
sendto_request: Outgoing ICMP packet length: 84 (84)
icmp_poll_eventhandler: flags: 0002
icmp_datahandler: Buffered 81 bytes
icmp_readahead: Received 64 bytes (of 81)
56 bytes from 39.156.69.79: icmp_seq=0 time=40 ms
Voila, finally, it's working :-)
Also, just in case, I could see some random failures during the ping: up_assert: Assertion failed at file:mm_heap/mm_free.c line: 170 task: ping
Conclusions
NuttX is definitely a promising solution - especially considering the eco-system that is forming arround it. However, at this stage the ESP32 support is quite limited. But the good news is that Espressif seems to be proactively adding support for their chip, so let's hope that within a few weeks WIFI - and other drivers - will be completely supported.
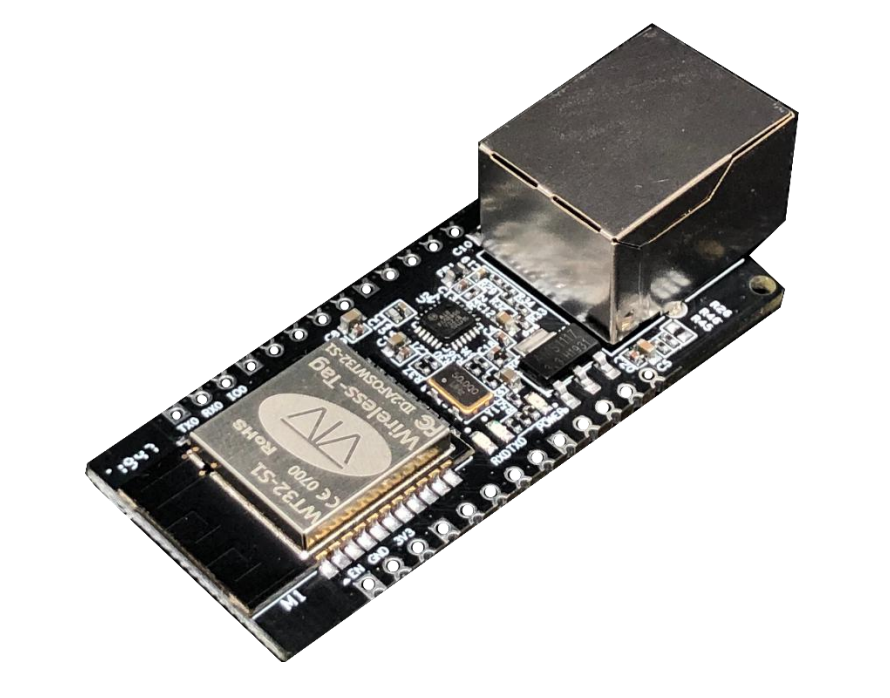
Next step is to try to enable Ethernet on the W32-ETH01