
I recently stumbled on the AI Thinker's "ESP32-G" WiFi+BLE+Ethernet smart gateway because of its cost and form factor.
The gateway is available at 98CNY (~15 USD) on Tabao, which makes it even more attractive than the low-cost TpLink WRT54GL routers, considering the vibrant Espressif eco-system.
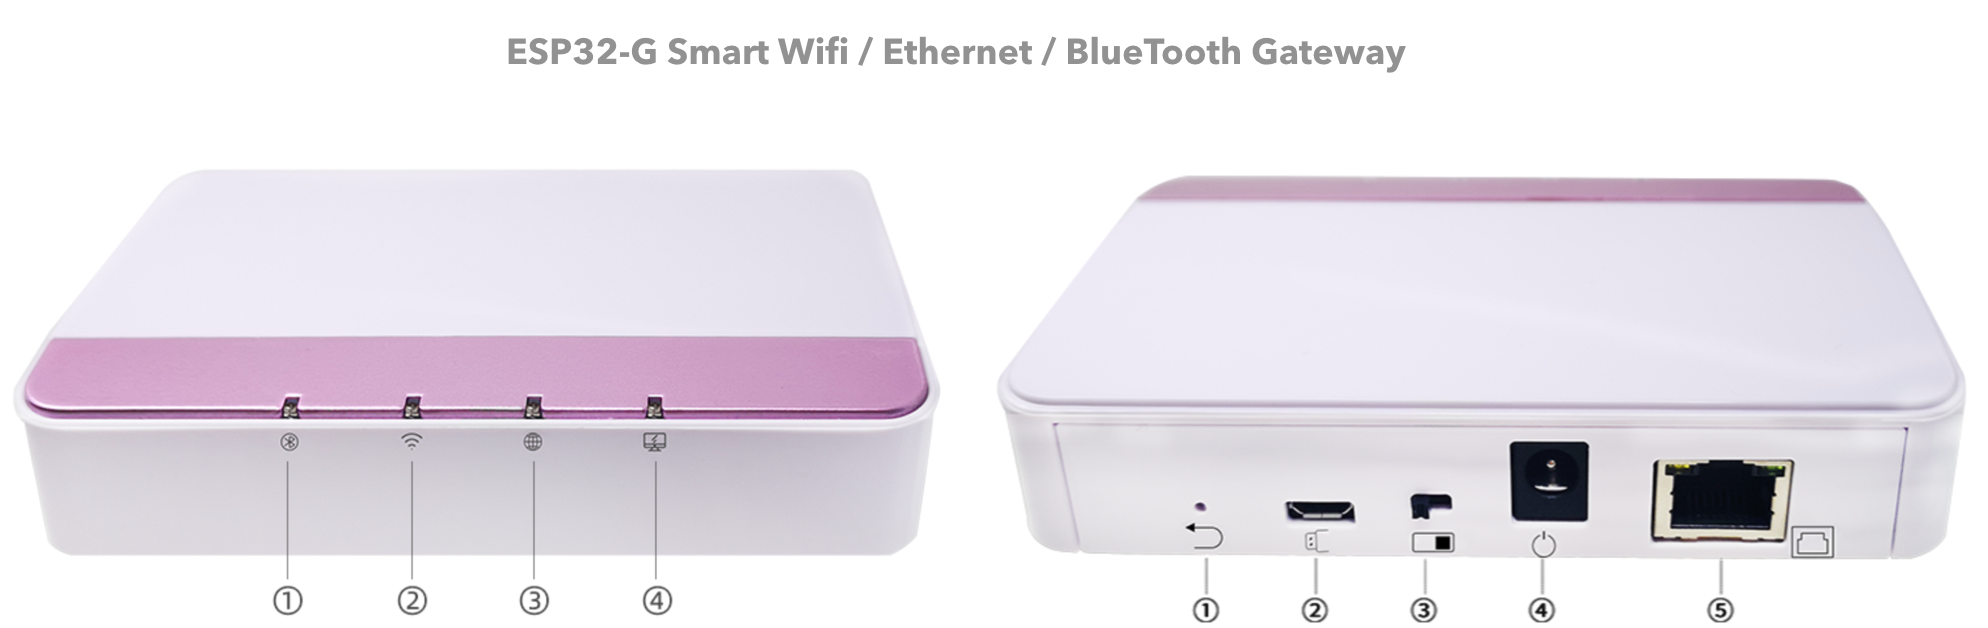
The primary objective of this gateway is to allow external Bluetooth or Wifi-mesh devices to connect to the LAN. The Software running on the gateway even comes with an MQTT client used to forward the message from the IOT devices connected to the gateway (see the doc for more info).
Anyways, regardless of how nice the preloaded SW is, the real question is can one flash the gateway with a custom software... and the answer is of course yes! But, first, let's have a look inside the box:
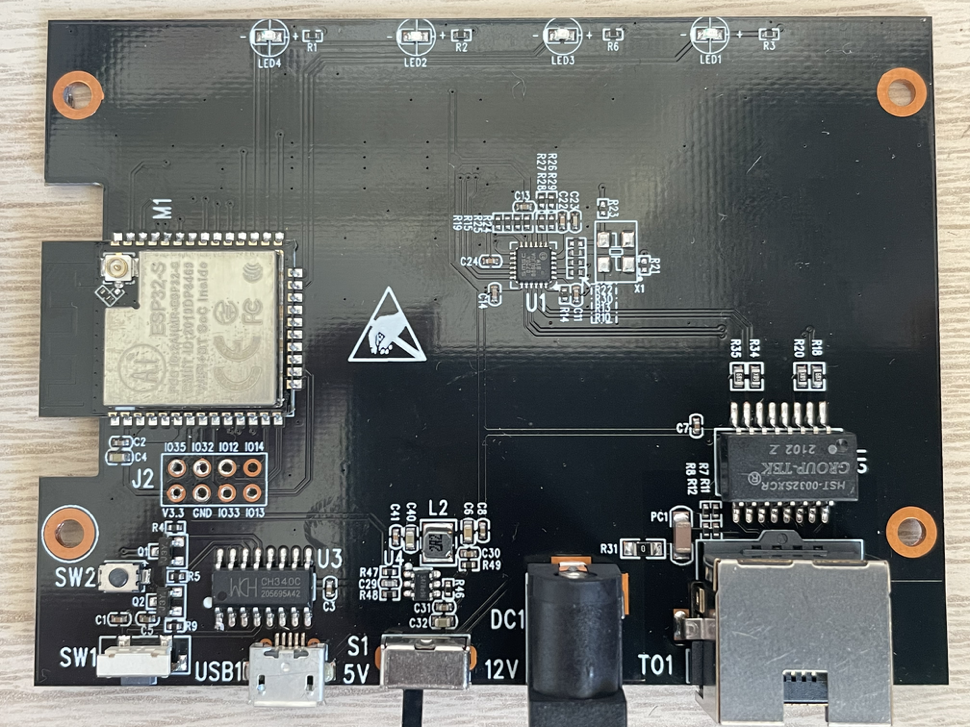
It's actually quite simple, which is not a surprise considering the price. The Ethernet controller is an LAN8720, the same as the one used in the WT32-ETH01. There is also a fully wired CH340 Serial TTL converter which allows to flash the gateway only using the USB port. And the gateway also exposes 6 GPIOs which can be used to add extra sensor or modules. Cool!
In the previous post, I have been using the WT32-ETH01 configuration to drive the Ethernet LAN. Let's see how the configuration changes:
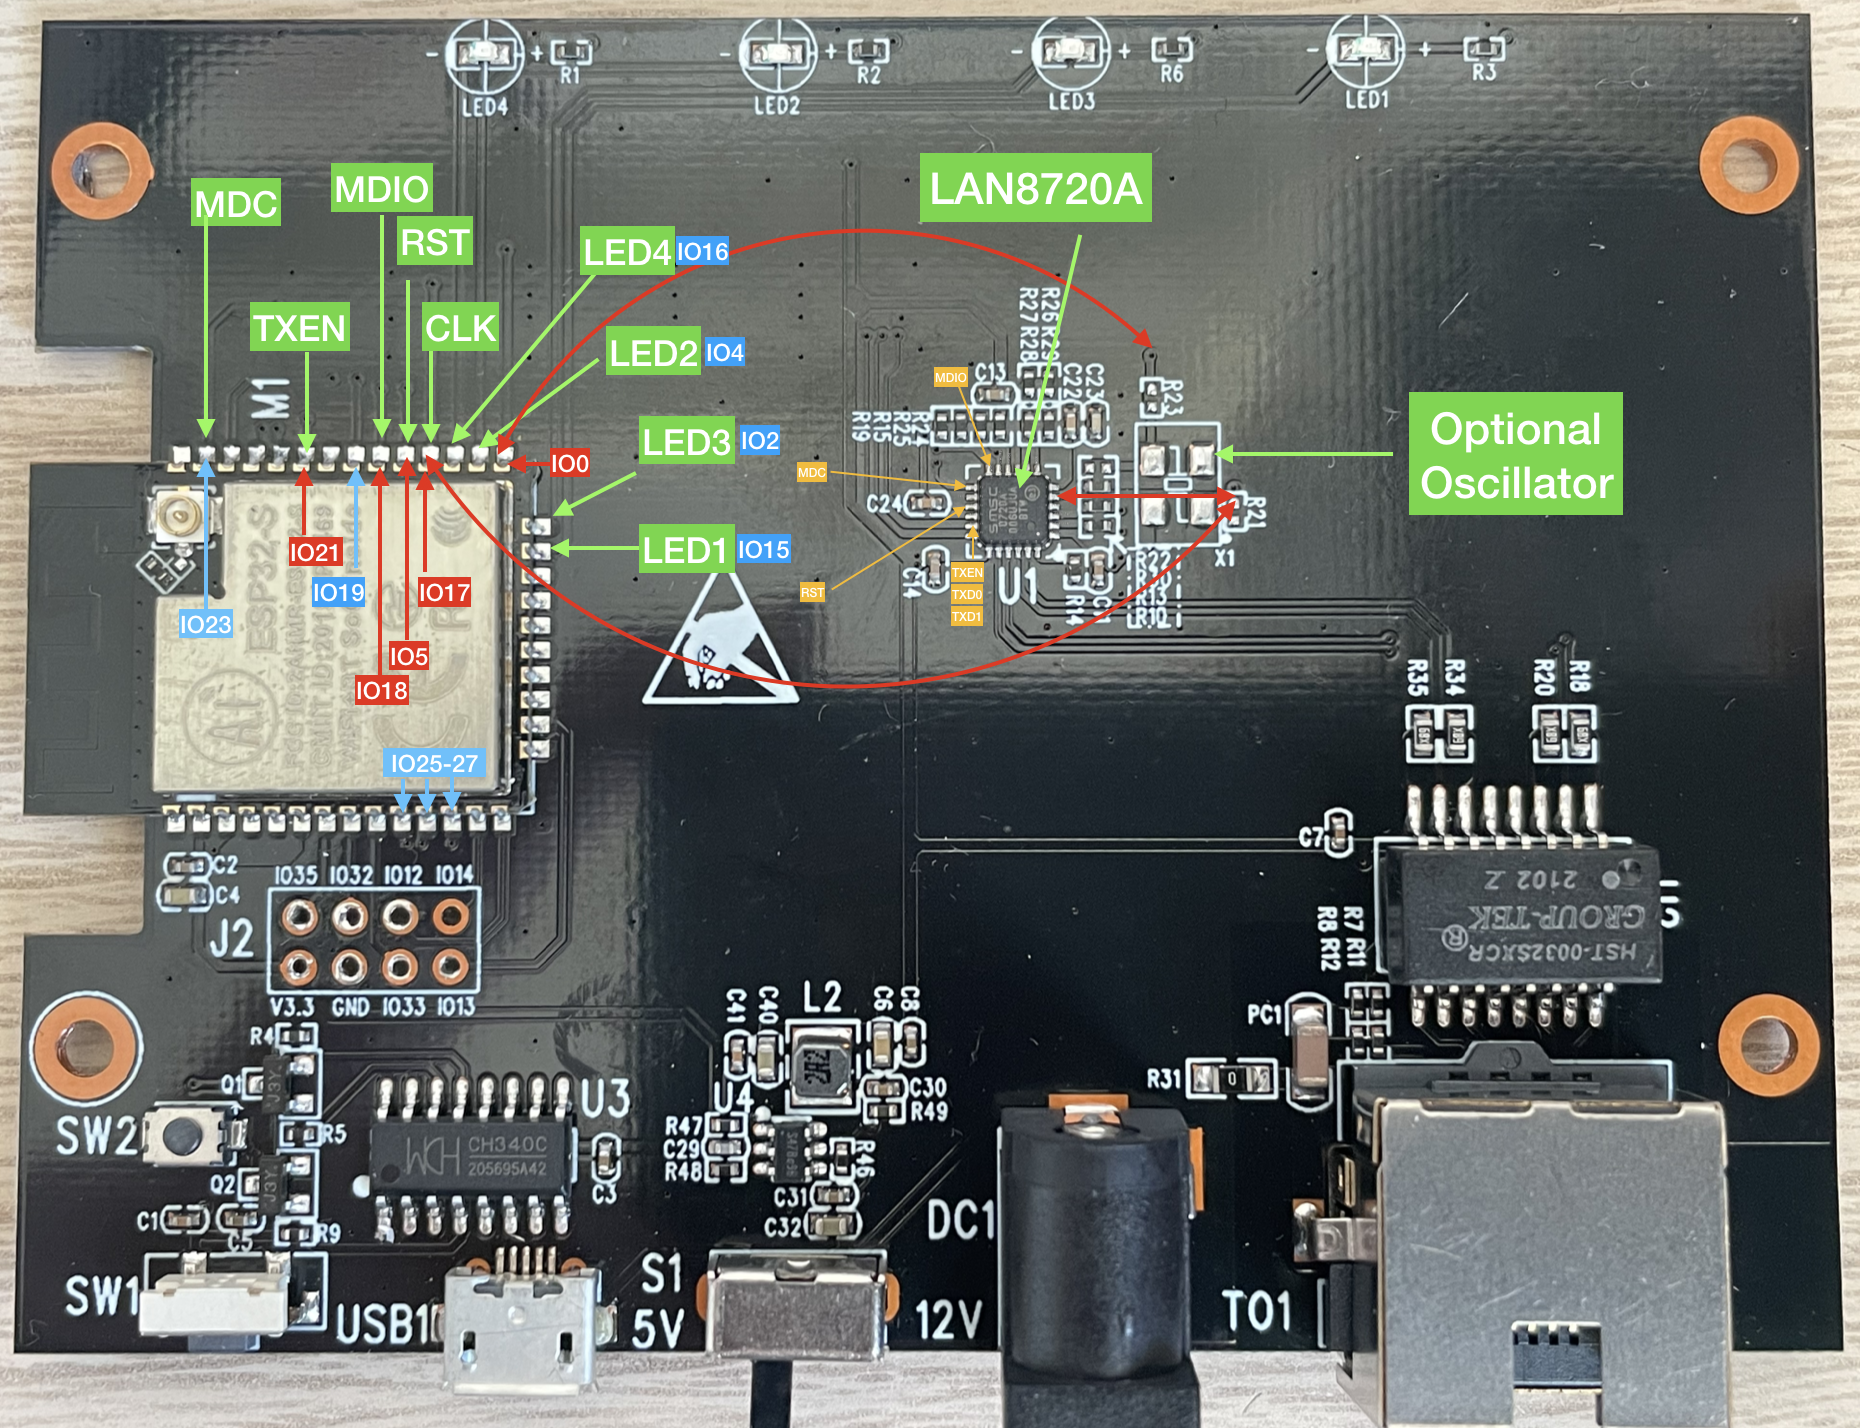
The main difference with the WT32-ETH01 is that there is no external oscillator to drive the LAN8720, so the clock needs to be provided by the ESP32, which it does via the GPIO 17. The other difference is the Reset (aka Power) PIN, which is using GPIO5 on the ESP32-G, while it was GPIO16 on the WT32-ETH01:
| Configuration | ESP32-G | WT32-ETH01 |
|---|---|---|
| Power (Reset) | 5 | 16 |
| Phy Address | 1 | 1 |
| MDIO | 18 | 18 |
| MDC | 23 | 23 |
| Clock Mode | OUT | IN |
| Clock GPIO | 17 | 0 |
The following initialisation code does work fine:
#define ETH_TYPE ETH_PHY_LAN8720
#define ETH_POWER_PIN 5
#define ETH_MDC_PIN 23
#define ETH_MDIO_PIN 18
#define ETH_ADDR 1
void initialize_ethernet(void)
{
eth_mac_config_t mac_config = ETH_MAC_DEFAULT_CONFIG();
eth_phy_config_t phy_config = ETH_PHY_DEFAULT_CONFIG();
phy_config.phy_addr = ETH_ADDR;
phy_config.reset_gpio_num = ETH_POWER_PIN;
mac_config.smi_mdc_gpio_num = ETH_MDC_PIN;
mac_config.smi_mdio_gpio_num = ETH_MDIO_PIN;
mac_config.clock_config.rmii.clock_mode = EMAC_CLK_OUT;
mac_config.clock_config.rmii.clock_gpio = EMAC_CLK_OUT_180_GPIO;
esp_eth_mac_t *mac = esp_eth_mac_new_esp32(&mac_config);
esp_eth_phy_t *phy = esp_eth_phy_new_lan8720(&phy_config);
esp_eth_config_t config = ETH_DEFAULT_CONFIG(mac, phy);
ESP_ERROR_CHECK(esp_eth_driver_install(&config, &s_eth_handle));
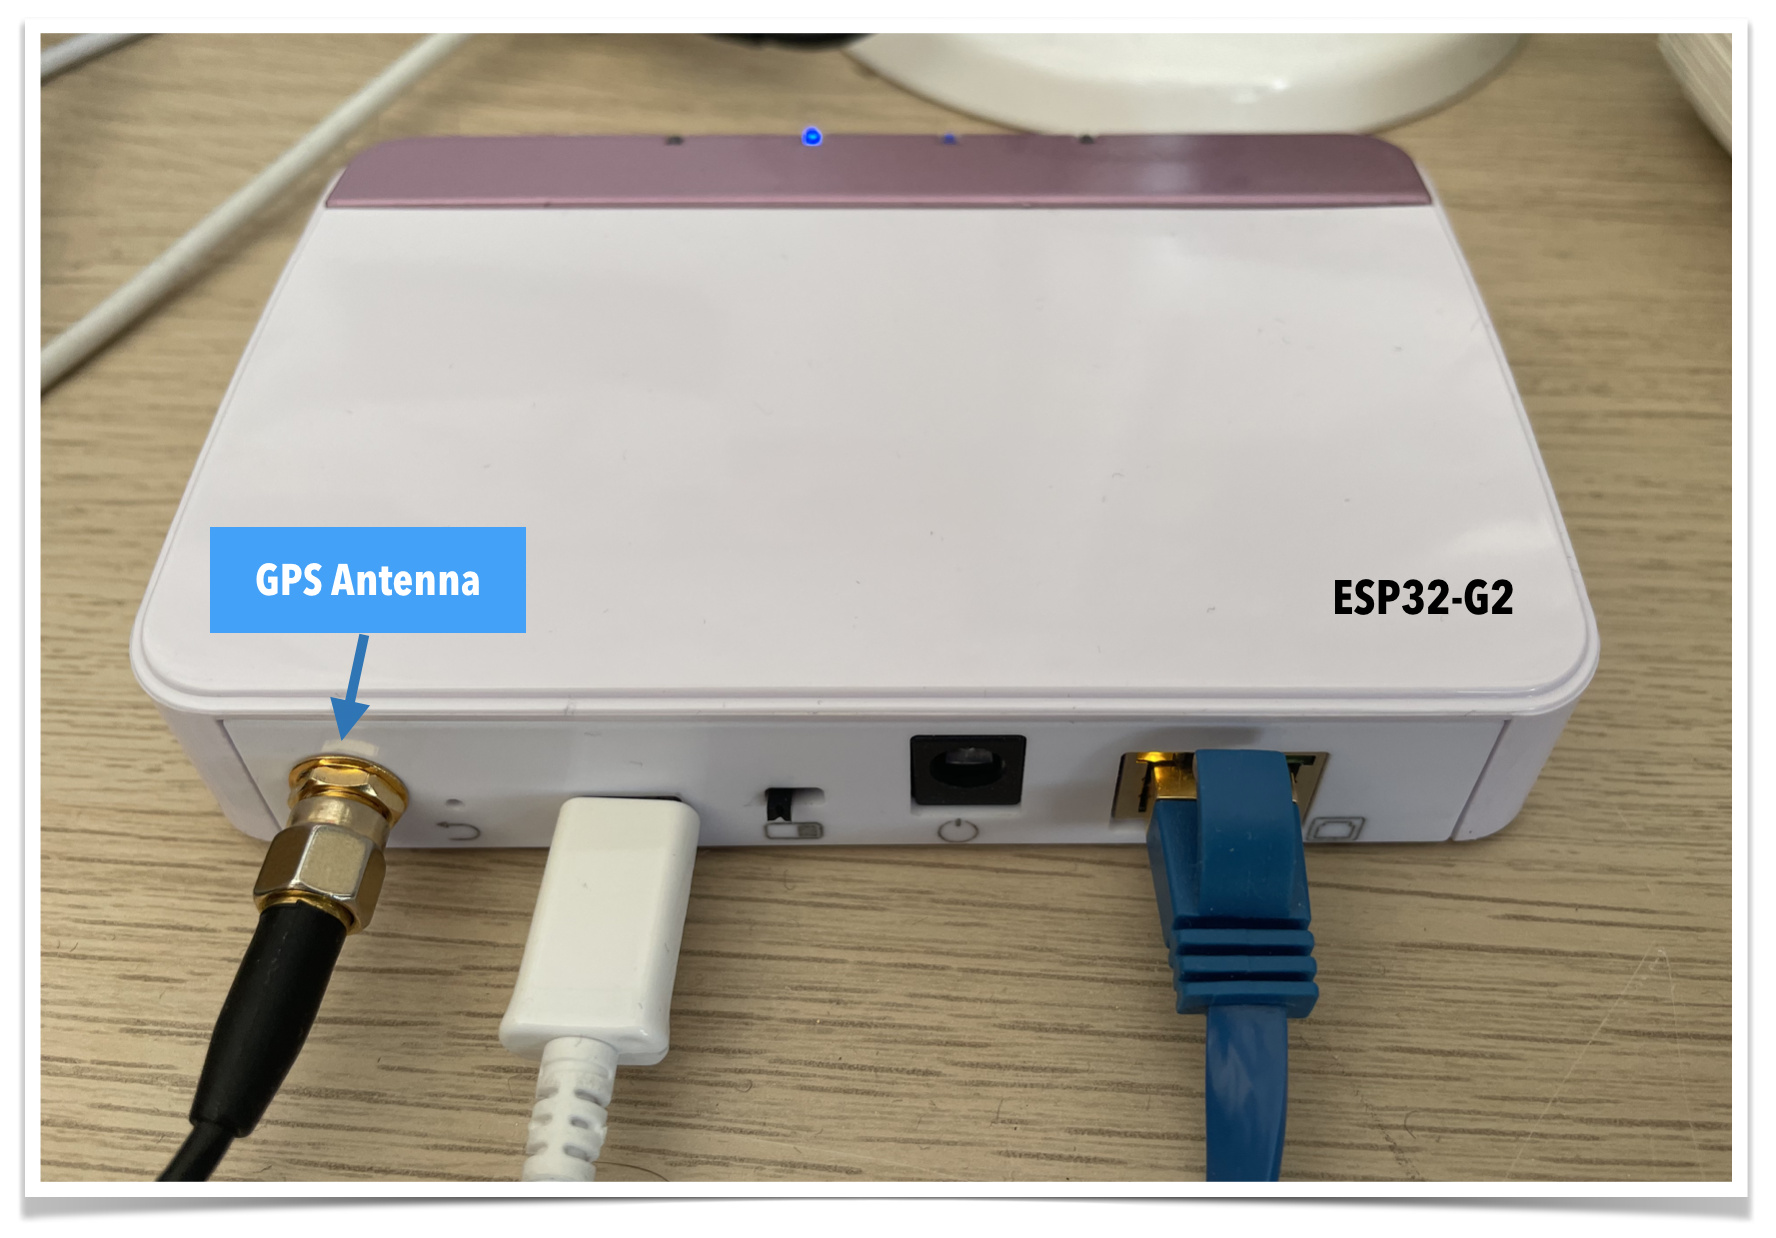
}Et voila, that's all what is needed to start using this cool ESP32-Gateway. In my case, I have already added an extra $3 GPS module.
In the next post, I'll be looking at enabling the WIFI mesh capability.